


How to build a raised bed: step-by-step assembly
You can build a Brick Premium bed yourself, with no screws, drilling or power tools. The pieces stack in layers and are joined with wooden pins. All you need is a rubber mallet and an offcut of board to tap on.
- 120 mm
- height of one layer
- 60 mm
- piece thickness
- 3D + PDF
- guide with every design
Updated 13/10/2026
What you need
- A rubber mallet.
- An offcut of board to tap on.
- The Studio guide: 3D layer by layer or as a PDF.
- A sturdy liner for the inner walls, not included in the delivery.
- A second pair of hands for larger pieces.
A guide with every design
Every Studio design comes with a 3D layer-by-layer guide and a PDF guide, showing where each piece goes. Open it any time in your saved design in the Studio, also after delivery. Ready-made products from the shop come with the guide included with the order.
Step by step
Prepare the base
Build the bed on a level, firm base that lets water through, such as lawn, soil or gravel. Level the base so the bottom layer sits flat along its whole length and the bed does not twist. On a slope, build the bed on levelled terraces.
Lay the first layer
Lay out the pieces of the first layer following the guide, which shows where each piece goes. Insert the wooden pins into the holes in the top edge of the pieces.
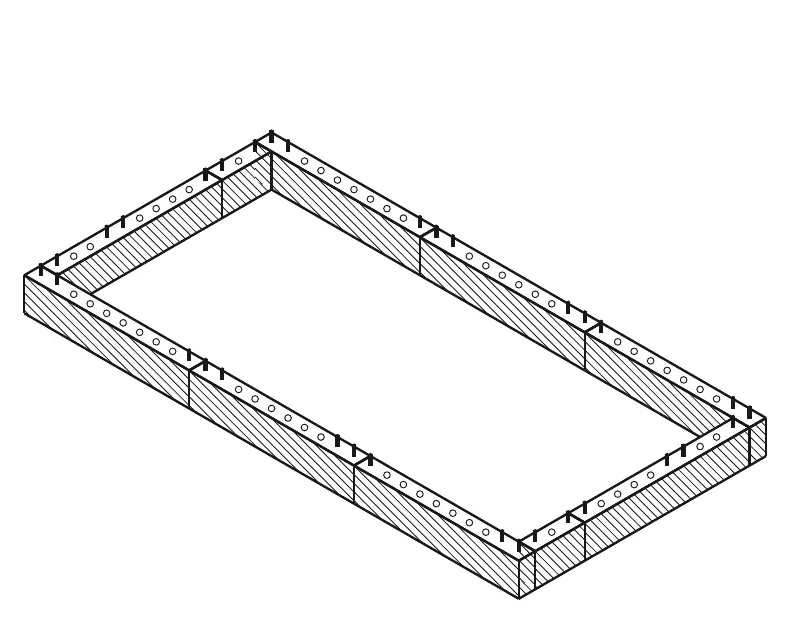
Layer 1 Add the next layers
Place the next layer onto the pins and tap it home with the rubber mallet over the offcut of board. Pieces of the upper layer overlap the joints of the layer below, like bricks in a wall. Repeat layer by layer following the guide.
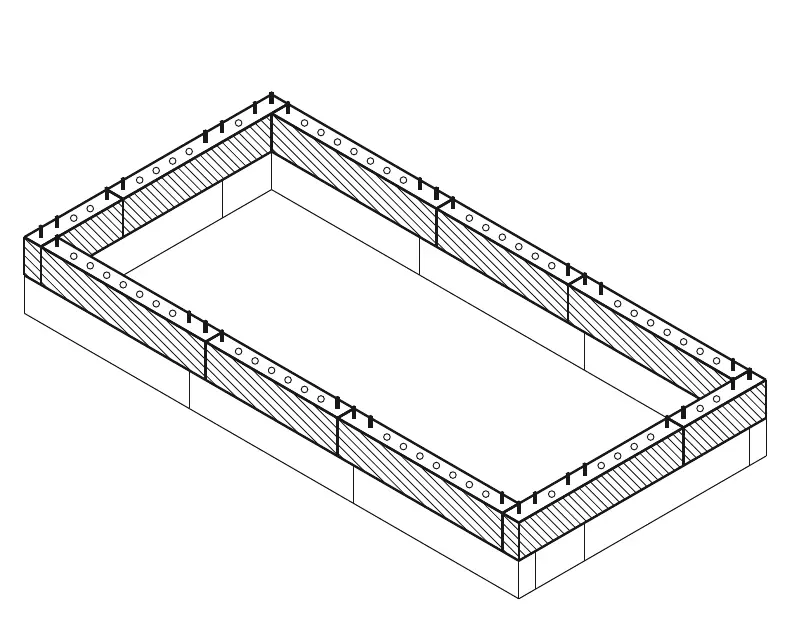
Layer 2 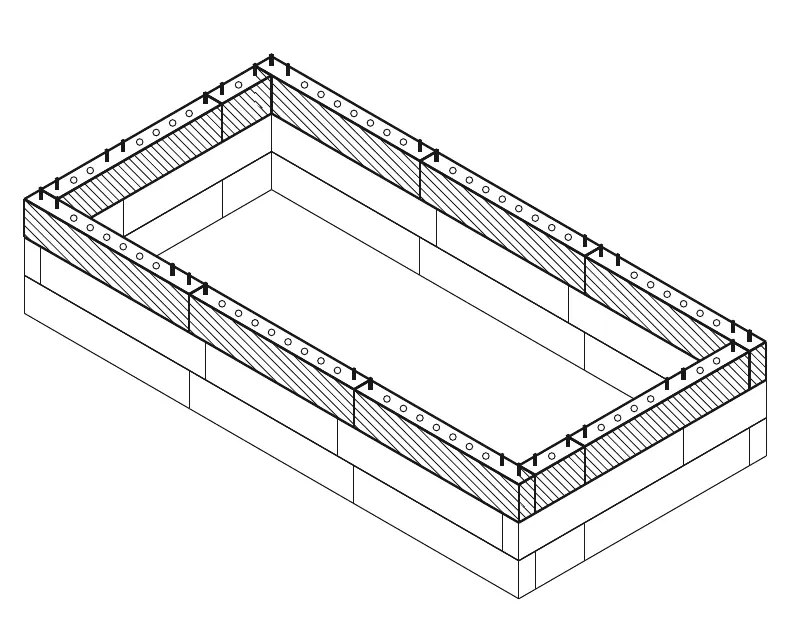
Layer 3 Finish with the top cap
The last layer is the top cap. Its pieces are lower and have no pin holes on top.
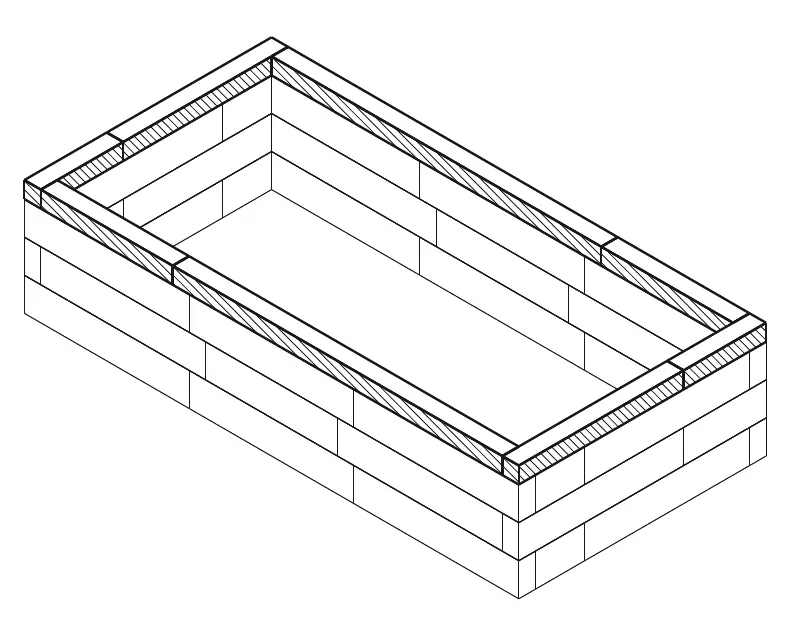
Top cap Line the walls
Line the inner walls with a sturdy liner, dimpled or as dense as possible while still foldable. It keeps damp soil away from the wood. Leave the bottom open to the ground so water can drain away.
Fill the bed
Put coarse material such as branches and leaves at the bottom, compost above it and good bed soil on top. The soil calculator works out how much you need for your size.


Make it taller or rebuild it later
The pieces join without screws or glue, so you can add layers, extend the bed, or take it apart and rebuild it in a different shape. The blocks are not damaged in the process. Order missing pieces from the Studio parts list.
Frequently asked questions
Can I assemble it myself?
Yes, you can assemble it yourself without power tools. The pieces fit together without screws or drilling, all you need is a rubber mallet and an offcut of board to tap on. A second person helps with larger pieces.
Do I need screws, glue or a drill?
No. The layers stack on top of each other and are joined with wooden pins, which are part of the delivery.
What base should the bed stand on?
A level, firm base that lets water through, such as lawn, soil or gravel. Level it before assembly so the bottom layer sits flat.
Where do I find the guide for my bed?
In your saved design in the Studio, any time, also after delivery: a 3D layer-by-layer guide and a PDF guide. Ready-made products from the shop come with the guide included with the order.